Christmas Crafts – Parenthood
Christmas is one of the most magical times of the year. Illusion, songs and lights are in order to celebrate another year. One of the key elements that mark the arrival of Christmas is the decoration. When the streets, houses, gardens and shops are filled with lights and trees, it means Christmas is near.
For this reason, today we are bringing you an article on Christmas crafts so that together, as a family or in classrooms, you can start decorating your homes or yards in order to create the atmosphere. of Christmas.
Christmas crafts
Christmas characters with cardboard
Santa Claus, the Three Kings, reindeer and snowmen are the stars of Christmas. Making these figures will be very easy if you use the cardboard cylinder of the toilet paper as a base, this way you will also be recycling materials. For example, to make a Santa Claus you will need the following materials:
- A cardboard cylinder
- Cotton
- A piece of red card
- Glue
- A pair of scissors
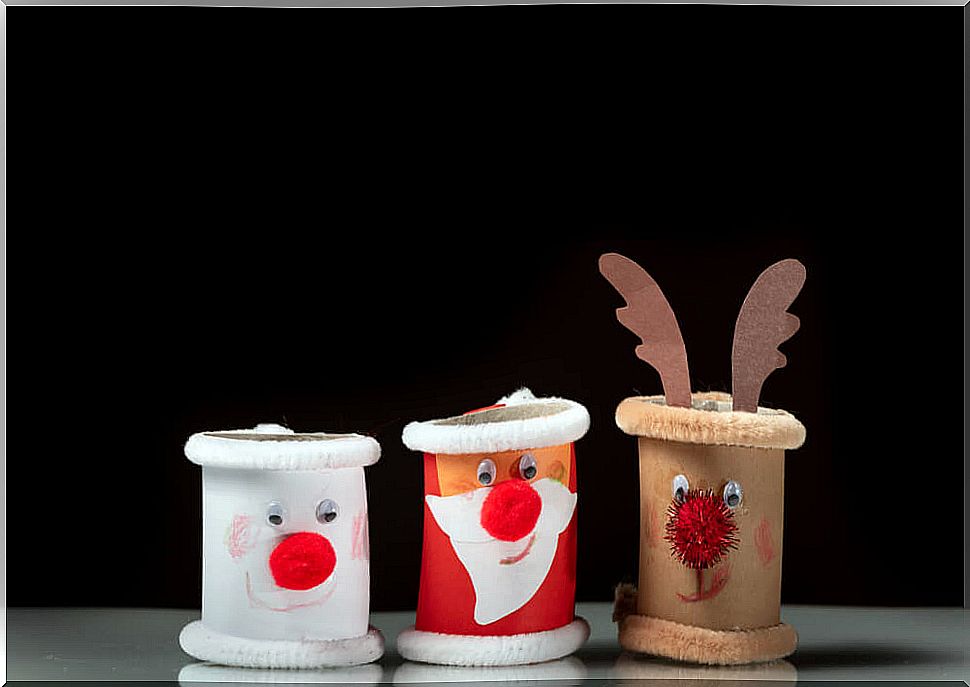
With the red card, you will line the middle of the cylinder down, creating Santa’s clothes. You must also use this cardboard to make the character’s hat. To do this, you just have to make a cone and put a small cotton ball on the tip of the cone.
On the part of the cylinder from the center to the top, that is to say the undecorated part, you will stick cotton in order to recreate the beard and the white hair of Santa Claus. You need to leave a space in the center of the cylinder to draw his nose and eyes. There you go, your Santa Claus is finished!
Likewise, you can craft other types of characters. You just need to use your imagination.
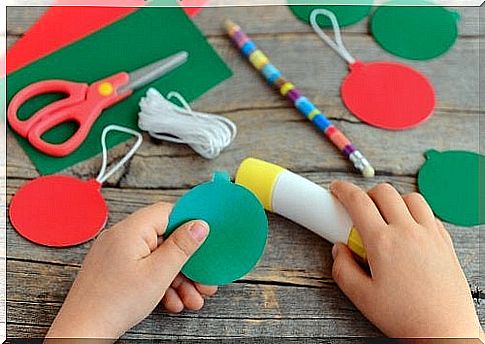
Christmas tree balls
As we have already said, fir trees are one of the most representative elements of Christmas. These are placed in homes and streets filled with decorations of various colors and shapes.
Without a doubt, the most important elements of a Christmas tree are its balls. Thus, we suggest you make balls for your tree. For this you will need the following:
- Cardboard paper
- EVA rubber
- A pencil
- A pair of scissors
- Thread or ribbon
The first step will be to draw, or trace, the shape of the ball on the piece of cardboard of your choice. Once the shape is cut out, the next step will be the decoration. You can use EVA rubber or any similar material you have at home. To decorate it, you can make snowflakes, stars or gifts in whatever shape you like the most.
Finally, in the upper part of the ball, you will have to make a small hole to pass the ribbon which will allow you to hang the Christmas ball on the tree.
A Christmas tree
The vast majority of children love to help put up Christmas decorations, especially the tree decorations. For this reason, they will love to make their own Christmas tree. To do this, you will need the following materials:
- Three ice cream sticks
- Colored buttons of the same size
- A brown cardboard
The first step will be to paint the three ice cream sticks green. Once painted, you will need to glue them in a triangle shape to simulate the shape of the Christmas tree.
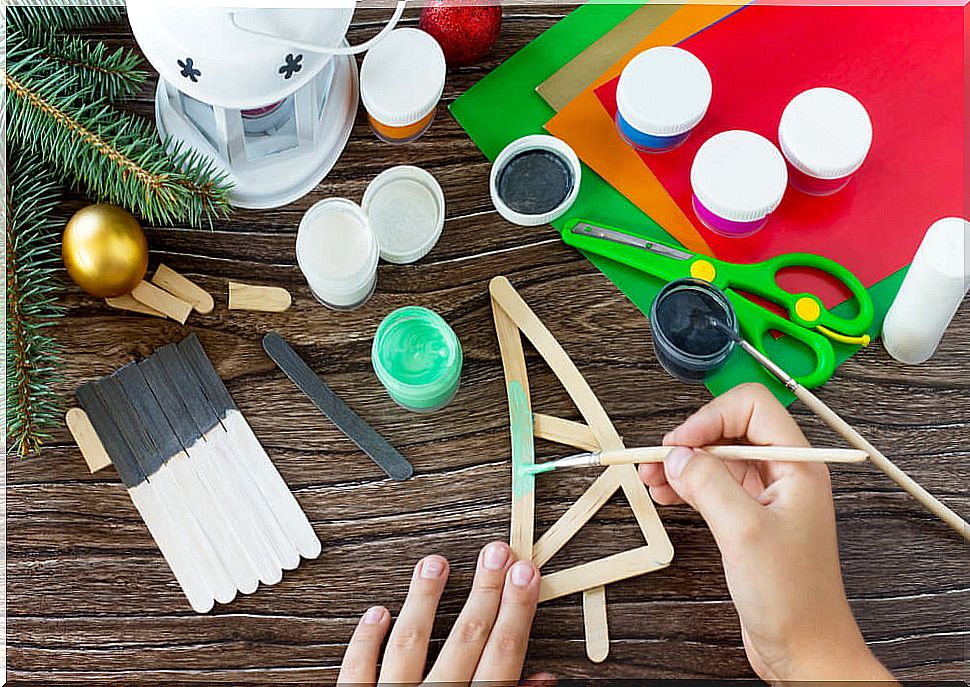
The colored buttons will be placed on the top of the sticks, to brighten it up. If you don’t have enough colored buttons, you can also use colored cards or sheets in which you will make small circles.
Finally, each tree will need its base. Also, with the piece of brown cardboard, you will cut out a small rectangle and glue it behind the ice cream stick which will be placed horizontally.
Santa’s reindeer, one of the best Christmas decorations
To craft Santa’s Reindeer, you will need the following materials:
- A plastic plate
- A piece of brown cardboard
- Brown acrylic paint
- Two ice cream sticks
- Two moving eyes
- A red pompom
The first step will be to paint the plastic plate with the brown paint. You must paint the back of the plate, that is, on the part that rests on the table and not on the part where you put the food. Once painted, the next step will be to glue the eyes and the red pompom, which will act as a nose.
With the piece of brown cardboard, you will make two small ears that you will place on the sides of the plate. Finally, the two ice cream sticks, also painted in brown, will be placed above the ears, simulating their antlers.